Wednesday, December 30, 2015

on 10 comments

Star Wars nails

No guesses are needed for what I painted these nails for, right! I've actually seen the movie twice already.  Once on a date night in the premium lounge with the hubby, and then again to take my 7 year old son.  We all thought The Force Awakens is totally awesome, loved the story, regardless of how similar it may be to A New Hope.  I can't wait for the next film in 2017.

I've done Star Wars nails before, back on May the Fourth, and that time I also did C3PO and R2D2.  I had to paint R2 again because his shape is just perfect for nail art.  I wasn't going to do C3PO again, until I saw my gold Minx nail wraps, and then I had to do him all metallic and shiny.  I really wanted to paint Chewbacca again, and wanted to do Kylo Ren too, because his mask would be perfect for nail art.

But in the end I went with a shiny silver Minx nail wrap and created the gorgeous chrome Captian Phasma.  On my index finger I painted the oh so cute BB8.  I had no idea how to paint BB8, so I took inspiration for Flights of Whimsy, who did a great Droids mani last week.


Monday, December 28, 2015

on 1 comment

Final Christmas themed nails for 2015

This is the nail art that I put together to wear for Christmas day.  I did a water marble using three shades of green polishes and a clear polish to show the base colour through a bit.  I then added some glitter placement using gold holo hexes for the wreaths.


Here is the polish beneath the green watermarble.  Smitten polish Antiquing.  Wow, just wow.  I bought myself this polish from Femme Fatale cosmetics as part of my birthday haul using a gift voucher some of my bestie nail polish buddies bought me.  It was such a great haul, and the funny thing was that I really went for 'me' polishes, lots of golds, holos, holo glitters and metallic shades. I'm so glad that I got this one.  The base colour is a strong metallic pewter shade than leans gold and it has a really strong holo flame.  This is two coats with Seche Vite top coat.


Saturday, December 26, 2015

on 5 comments

40 Great Nail Art Ideas - New Year

So now that Christmas is over, it's straight into nail art for the New Year.  I also have to report that I'm feeling some nail art mojo returning.  I'm thinking it was my stressful weeks at work that were wearing me out, and this time off over the Christmas/New Year period is going to recharge me nicely!  

This weeks prompt in the 40 great nail art ideas is New Year and I have to say I'm pretty damn impressed with how good these turned out.

I started with a plain black base and tried to do some stamping with foils.  The idea is that you stamp like usual, and then working really fast you pretty the foil onto you nail and it will stick to the stamped image.  That was a total fail and I didn't manage to transfer anything.  All I ended up doing was transferring my stamped image on to the back of the nail art foil.

So then I grabbed out my nail art foil glue and used a fine brush to paint on the firework lines.  I then pressed the foil onto them.  I did this twice on each nail using two colours of foil, plus each foil was holographic, which is why you see more than just one colour per firework.  

I have to say that these photos are prior to top coat, cause they just looked amazing.  When I added top coat I lost some of the holographic appearance, but they still looked pretty good and they didn't wrinkle.  I used two coats of Ulta3 clear and then a layer of Seche Vite.


Friday, December 25, 2015

on 2 comments

Merry Christmas 2015 with Picture Polish Saphira

Merry Christmas and Happy Holiday's to everyone.  I hope you have had, or are about to have a wonderful day. It's the end of Christmas day for us, the kids are in bed, wiped out from an exciting day of presents and playing with extended family and I'm still full from over indulging at lunch!

To all the ladies that commented on my last post. Thank you. I'm working through following all your blogs through my RSS reader, if I haven't commented back to your comment yet, I will do so in the next day or so.

I'm a bit behind in showing some Christmas nail art and I still have two designs to share.  I'll show my actual Christmas one tomorrow.  These are some very quick and simple ones I did earlier this week after I had spent the evening wrapping presents and didn't want to spend very long on my nails. 

The base polish is Picture Polish Saphira, which is a dark and inky blue jelly with a scattered holo effect, as well as small holo hexes and slightly larger holo hexes.  Coverage is excellent and this is two coats with Seche Vite top coat.  The tree is stamped using Mundo de Unas Gold and CJS Tree plate.


Wednesday, December 23, 2015

on 71 comments

Post your nail blog in the comment

Thank you ladies who commented on my last post.  I'm no quitter, so I'll just keep on trucking and work on getting my blog mojo back.

I got a new ipad for my birthday a few weeks back and despite restoring it from my backup, I lost my entire RSS feed in the reader.  I originally ported my RSS feed across from google's reader a few years ago, and many of those nail blogs have closed down and don't post any more.

I'm going to go through an add the active ones back, but seeing as I'm doing that, I want to see your blogs so I can follow them too.

Now's your change ladies, please post a link to your blog below so I can check it out and add it to my reader.


Tuesday, December 22, 2015

on 15 comments

Stamping decals with Pretty Serious and DRK

I have plenty of manis to share here, but I can't help but feeling like nail blogs are becoming a little irrelevant these days with Instragram pretty much taking over. That of course makes me pretty uninterested in posting much here.  Of course blogs are way better for historical purposes, if you are looking for swatches and reviews or for specific nail art, but my blog views have really dropped off over the last 12-18 months compared to where they used to be and I'm feeling pretty 'meh' about it all really.  

I did always say that the purpose of my blog was for my nail polish chronicles, and if other people get something out of it then great. What do you guys think, are blogs becoming irrelevant?

Anyway, let's look at today's mani, which I created using some of the polishes from the Pretty Serious Christmas collection.  The silver is Frosty the Snowborg, red is Santa's Sunburn and the green is Hack the Halls.  The polishes are all so gorgeous and I will be doing some swatches during the upcoming holiday season.


 I created a stamping decal using DRK Designer plate 1 stamping plate, which has lots of symmetrical designs that can easily be coloured in for stamping decals.


Stamping plate provided for consideration, polishes purchased by me.

Saturday, December 19, 2015

on 2 comments

40 Great Nail Art Ideas - Christmas + clear jelly stamper

I've been missing in action this week. Sorry about that. I had a pretty big week at work with a number of things I needed to prepare for in the evenings, which meant they old blog got bumped to a lower priority.  The first was a presentation to the entire division that I work in at our end of year Divisional meeting.  Then on Friday I had a job interview for a position I have been acting in for the last 2 years.  So all in all it was a pretty stressful week!

This weeks theme for the 40 Great Nail Art Ideas Challenge is Christmas and luckily I had prepared this mani last week for our work Christmas party, because I pretty much didn't even do nail art this week, I just had nicely polished regular nails.

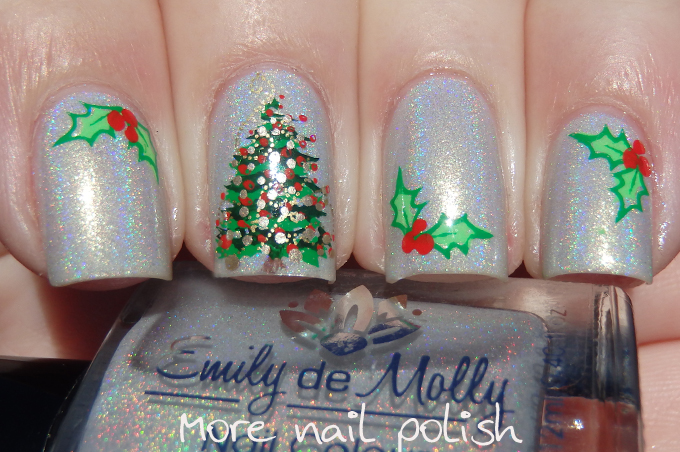
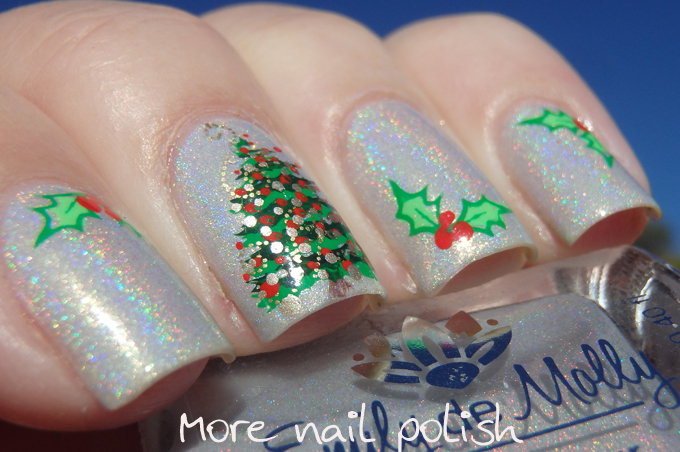
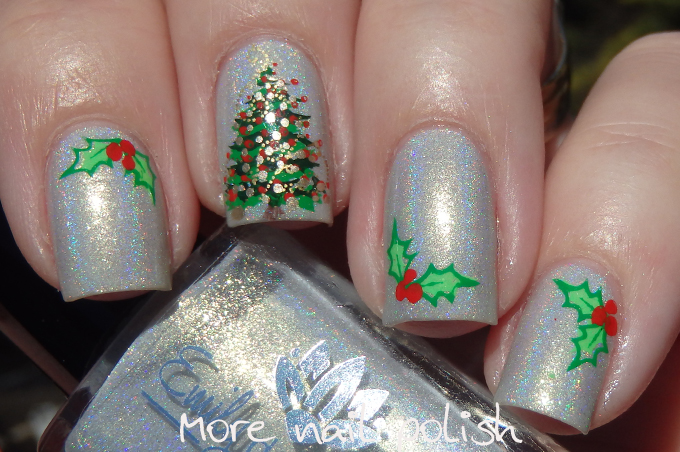
The base for this mani is Emily de Molly Crystal Crown.  It's almost in the white holo category, but it's probably just the slightest shade of pale grey.  What I love about the shade is the strong gold shimmer that it has, which really seems to neutralise the grayness of the polish. Perfect formula too, this was two thicker coats.

My stamping for this mani was done using a clear jelly stamper and the plate is CSJ01 - Christmas tree plate.  I purchased this plate from Clear Jelly Stamper and had it included with my replacement flower plate.  When I originally purchased my Clear Jelly Stamper, I did it through a group buy with some other Australians. At that time I purchased the original CSJ01 plate with flowers on it, but I was unable to pick up any of the images on it with the jelly stamper.  I contacted CJS and they were fantastic. They said they did have a few plates slip through that weren't etched deeply enough and that they would send me a replacement plate.  I'm pleased to say that the replacement plate is much better, and I will have a mani using that plate soon.

If you are having trouble picking up images with your Clear Jelly Stamper, I find the technique that works for me is roll across the image quickly, rather than pressing straight down, or doing it slowly.


Check out my facebook or instagram over the next day for two up coming videos for the stamping on this mani, one of the holly and the other of the tree.


Polish provided for consideration, plates and stamper purchased by me.

Saturday, December 12, 2015

on Leave a Comment

40 Great Nail Art Ideas - Winter

This weeks theme in the 40 Great Nail Art Ideas challenge is Winter.  

I was running late on preparing myself this week, and only managed to get this mani together on Thursday night.  But the upside was I was able to use my new Pretty Serious polishes that I had just ordered last weekend.

My design is a simple gradient with snowflake stamping.  Pretty common in the nail world, but it completely blows the socks of my nuggle friends.  Only problem is, because Jamberry recently launched here in Australia and their marketing is everywhere, I often get asked if they are Jamberry's!

The two polishes I used here are Frosty the Snowborg (silver) and A Christmas Time Paradox (blue) from the Pretty Serious Ghosts of Christmas Future collection.  The snowflake images were from Clear jelly stamper Christmas plate CJSC-01.


Thursday, December 10, 2015

on Leave a Comment

DRK XL Designer 1 plate with Clear Jelly Stamping

I've been playing with my clear jelly stamper again.  I'm getting more used to it and am getting much better results. I wanted to try out this two toned look to really use the clear stamper to it's maximum potential.  What I mean by that is that I wanted to stamp something where placement was really important.

I created the look by painting my nails in different combinations of red, black and white in a half and half look.  I then did two tone stamping in contrasting colours over the top.  This look is really easily achieved if you tape off sections of your nail, but this mani was done with no tape and each finger was stamped in one go.  It made this complex looking design much quicker to create.  Make sure you scroll down to see a quick video of how I did this.


The stamping image I used was from DRK  XL Designer 1 plate.  I love this plate so much. There are so many gorgeous areas of the plate to choose from.  I can't wait to use those flowers and leaves down the bottom left and there are so many options to create stamping decals or do reverse stamping.


The DRK Seasons plate is available from the DRK Nails website.

Plate provided for review, polish and stamper purchased by me.

Wednesday, December 9, 2015

on 1 comment

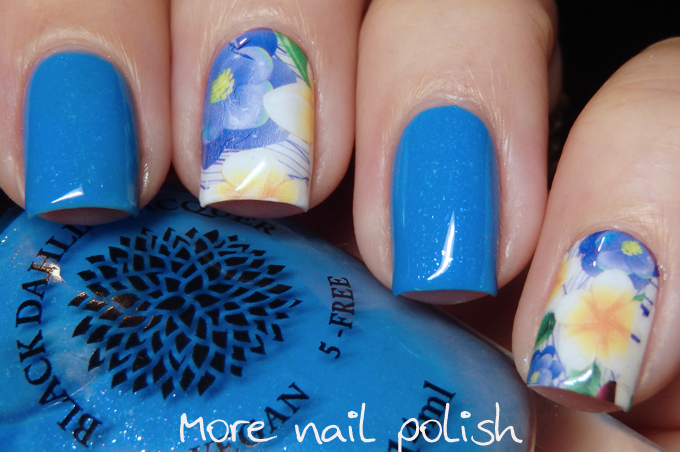
Flower water decals from Lady Queen

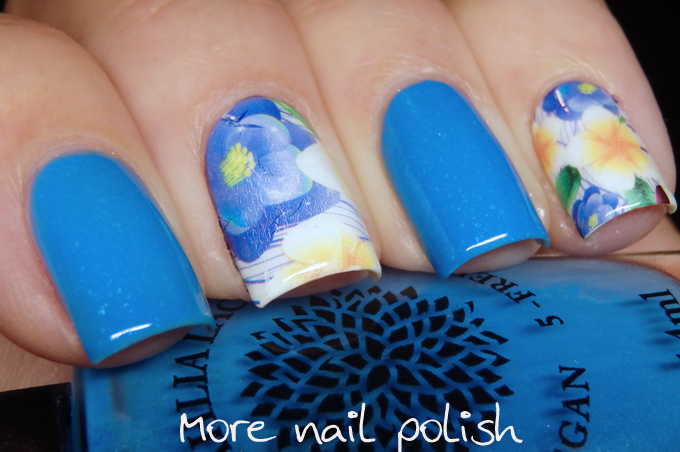
I have some flower water decals that I received for review from LadyQueen to show you today.  Lady Queen is an online store that supplies a multitude of nail art and other beauty items.  These water decals come in sheet designed for 10 fingers, but the designs too narrow for me to get each finger covered in a decal, so instead, I use them as feature nails mixed in together with regular nail polish.

This water decal design actually has an equal balance of pink and blue flowers, but the way they ended up on my nails really only shows the blue flowers.  That is why I paired them up with a gorgeous blue shade called Blue Bonnet Bingo from Black Dahlia Lacquer.  You could easily achieve a similar look with all pink shades if you placed the water decals differently on your nails. 
These decals are really easy to use.  You need a white base polish underneath, and then just cut them to your desired size, soak them in water and slide them on.  If you don't manage to get them cut perfectly to the right size of your nails, then you can use acetone to easily clean up the edges of the water decals.


Here is my 15% off code for Lady Queen for you all to use, YHOS15.


Products provided for review.

About Me

My photo
I live in Canberra, Australia with my husband, Mr Ten and Miss Eight. My blog is all about nail polish, and a few other bits in between. You can contact me at morenailpolish@iinet.net.au