Wednesday, December 31, 2014

on 13 comments

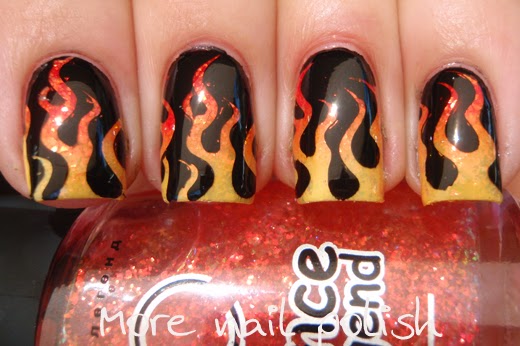
Favourite nail art from 2014

All around nail blogs right now, ladies are listing out their favourites from the year, whether they be favourite mainstream brands, favourite indie or boutique brands, favourite nail art, favourite nail polish and so on.  But damn, it's so much hard work. Kudos to you ladies that go all out with those lists.  I've only got the stamina to do two lists, one of my favourite nail art, and another with my favourite polishes - all brands lumped in together.

Today I have picked out some of my favourite nail arts, so lets take a trip down memory lane from the year that was 2014.  These are in no particular order.


On instagram, four of these manis made the my top five most liked photos of the year, but my #1 most liked post on instagram was this video:

A video posted by More Nail Polish Blog - Cathy (@morenailpolish) on

Have a happy and safe new year everyone and see you next year!

Tuesday, December 30, 2014

on 10 comments

Scaled stamping over Gaia with Messy Mansion accessories

I have a post Christmas catch up with my closest nail friends, and was lucky enough to get some of the new Messy Mansion accessories.

I got a stamping template.  This neat little metal plate is the same size as a credit card and is made of satin finished metal.  It has five sizes of finger nail holes. I found the the middle size was perfect for my index, middle and ring finger, the second smallest one was right for my pinking and the second largest one was right for my thumb. The engraved Messy Mansion design on the plate is also stampable using creme polishes, but not shimmers, as it's not very deep.


Here is how my index finger lined up in the template.


I then used the template to select a section of the stamping plate to be sure what would fit on my nail.  This is a suki plate from moyou.  I'd seen this done on other blogs using a piece of paper or card, with cut out area for your nails, but I had never bothered with crafting one up.  All the hard work was already done for me with this template.

Although I didn't try it, Julia from Messy Mansion said that you can actually pick up the stamping design through the template.  Eg, paint, scrape, put template down and then pick up the design.  This saves you picking up too much other design onto your stamper that you then have to clean off.  But like I said, I never tried that.


 Also included in the accessory kit is this transparent scraper.  Its lovely and flexible with smooth edges and does a great job at scraping my plates.  I love that it is transparent too, because it means I can see if I'm applying too much or too little pressure as I scrape.  It cleans up perfectly with acetone and doesn't leave any white marks from melted plastic, nor does the black Messy Mansion motif get gross and come off, because it appears to be sandwiched inside the plastic card.


The accessory kit also comes with a Priming Block - which is a magic eraser for those that know what they are.  It does a great job at cleaning off any shiny residue from a stamper.

The accessory kits are currently being packaged up with different configurations. One with three scrapers, a template and a priming block will be about $5 from what I read on the Messy Mansion Facebook group.

Now onto my stamped mani over Gaia. 


Monday, December 29, 2014

on 12 comments

ILNP - Multichrome Flakie - Gaia

I promise you there is no trick photography here.  There is no photo shopping to enhance colours or adjust tones, these polishes really are just this awesome!

Today I have Gaia from the I Love Nail Polish Multi-chrome Flakie collection (actually ILNP are calling the Ultra-chromes) but I'm sticking with Multi-chrome because we polish lovers already know what that means.

Once again, I'm showing what these polishes look like on their own.  No undies and with a single layer of Seche Vite top coat.  Again I achieved this look using a makeup sponge to apply the flakies, and yes, I did record a short insta-video for you that I will add to the end of the post.

Gaia shifts from a light lime green through turquoise to royal blue. 


Here is the application video, sorry it's fast, only got 15 seconds.  I did three applications on the sponge to achieve full coverage on each nail.  There is no base colour, just base coat.  The flakies just stick the the nail perfectly off the sponge. Any questions just let me know.

Shit just got real with these polishes girls, you really need at least one in your life!

Sunday, December 28, 2014

on 11 comments

ILNP - Multichrome Flakie - Neon Rosebud

Here is the second I Love Nail Polish brand multichrome flakie.  This one is called Neon Rosebud and the colour shift goes from a rich magenta base pink base to bright yellow/gold and then green.  It's actually an identical colour shift to Dance Legend Roz, but the flakies pack way more punch!

Once again I applied this polish using a sponge.  I will be making a video of this application technique tonight when I choose another multichrome flakie to put on, in the mean time, please enjoy lots of pictures of this amazing polish.


Saturday, December 27, 2014

on 8 comments

ILNP - Multichrome Flakie - Success

The I Love Nail Polish (ILNP) multichrome flakies went on sale for general orders today, but back in mid November I ensured I grabbed the whole collection as part of the pre-order. Let me tell you that I'm so glad I did!  I haven't been this excited about nail polish for a while.  These really are something new and really quite incredible.  

To be perfectly honest, there isn't a hell of a lot of polish making skill going into this collection of multichrome flakies, the flakies are doing all the work here!  That is because these polishes are only a mix of a single multichrome flake in a clear base for each polish, but what is impressive is that the ILNP brand is the first one I've seen that have this very vast range of colours - 13 of them in fact.  Two of them look really similar to me in the bottle, and only after I wear them will I know how different they actually are. But I wont be rushing to swatch these babies in one go, I'm going to be wearing each one at a time.  That means I will only be showing on polish at a time sorry - but I will do a sum up post at the end with picture of all of them.

The first one I chose to put on was Success.  Rather than layer this over black or anything else, I wanted the full multichrome effect, so I created full coverage by using a makeup sponge to apply the flakies.  It works perfectly to get full coverage, because the base polish gets soaked into the sponge meaning you don't end up with a thick layer of polish.  Let me know if you want a video that shows how I do it!

The colour shifty goodness of Success goes from a warm bronze through yellow, to green, blue and even purple at extreme angles.  Let's look at all my photos of this gorgeous polish!


I have so much love for these multichrome flakies - I'm wearing another one right now.

Which ones did you guys get??

About Me

My photo
I live in Canberra, Australia with my husband, Mr Ten and Miss Eight. My blog is all about nail polish, and a few other bits in between. You can contact me at morenailpolish@iinet.net.au